Showing posts with label inspiration. Show all posts

6.10.2011

Blog Love + Sharing a Reader's Chevron Painted Table


source
Lately, I have been feeling the love from fellow DIY bloggers. Robin, from Rasz Art, wrote a very flattering post about my blog and my projects. Totally made my day!! She is so sweet, and a talented blogger and DIYer to boot. Thank you, Robin!

source
Also, to those who leave me comments, thank you so much! The fact that you would take time out of your busy day to send some love my way speaks volumes about the kind of people you are - wonderful and kindhearted people, that's what you are.  :) Your comments are so encouraging and flattering that it knocks my socks off! It's like opening a present every time Blogger notifies me of a new one. 

I also want to thank those of you who have recently or in the past sent me a blog award. It means so much to be recognized by talented DIYers like yourselves. 

In addition to all that crazy awesome blog love, it seems like every week I've been gaining new people who are following along. [As a side note, I try to follow each and every one of you back. If I missed your blog somehow, please know it was not intentional and resend me your blog link in a comment.]

Thanks so much, my blog and DIY colleagues! It has been great--and will continue to be great--connecting with you and getting to share project ideas with each other.
Photobucket
~~~~~~~~~~~~~~~~~~~~~~~~~~~~~~~~~~~~~~~~~~~~~~~~~~~~~~~~~~~~
On a similar note, I want to feature Tara's project now. She wrote me to say that she used my Chevron template to paint her Ikea end table. Here is a picture:


Click here to see the picture on Tara's Pinterest board, where she initially posted it. 
[Click the picture or this text to follow her inspirational boards on Pinterest.]


Isn't it stunning?! I love the colors she chose, and this table seems to be the ideal piece of furniture to paint a pattern onto the top. Perfection! Thank you, Tara, for using my template and for sharing the pic with me! 


When I created the Chevron template initially, I used it on a thrifted tray. Now, I'm looking around the room to see what else I can use it on. Ha ha! Here is the free, printable Chevron pattern template in case anyone else wants to use it. And if you do, please send me pics or a link like Tara did so that I can see your creation! :) I may show it off here with your permission. 

12.08.2010

Warm and Comfy Sweater Pillow!

I had quite a bit of leftover cable knit sweater from my sweater candle cozie project, so why not make a pillow cover? Sweater pillows have been popping up in home decor stores as well as all over the blog world lately. And I can see why because they give you a warm comfy feeling whether you are resting your head on one or just staring at your handmade sweater pillow in admiration. 

Here is how mine turned out:

It was soo easy to make, even without a sewing machine! I simply placed my pillow form inside the body of the sweater--luckily, it was a perfect fit--and then cut one side and hand sewed two of the sides. 
I didn't turn the sweater inside out while I sewed, so it has kind of a rough edge. I'd like to say I did that for some creative unique reason, but honestly, I just wasn't really thinking. It's not bad, though! 
P.S. The husband really liked this one! That's saying something because his enthusiasm for my projects has waned recently, probably because I tend to strew unfinished projects throughout the house, not wanting to put them away until they are completely finished. Haha...oops! At least he's a good sport about it. I can make this one of my many New Year's resolutions.  

P.S.S. My little Heidz approves! She is an expert on all things comfort-related, so I value her opinion highly. (I am not crazy, I promise...okay, maybe a little dog crazy.) 
She was wearing her Christmas sweater because we just got back from taking our family Christmas portrait. Some dogs may feel humiliated when their owners make them wear clothes, but Heidi LOVES a snug little tee or sweater.
I also need to throw in a pic of my other cutie patootie, Jini. Otherwise, I would feel like I was leaving her out .
Yes, that is a leopard print Snuggie and my fleece jacket that she is laying on. She is my other comfort expert, if you can't tell. ;)
Photobucket
Thanks for looking! Check out these awesome linky parties:


Fine Craft Guild


12.05.2010

Sweater Candle Cozies {tutorial}

We got some lovely snow yesterday here in North Carolina. The snow came down in big soft flakes - it was beautiful! It was the perfect opportunity to stay indoors and do a winter project. I've been dying to try this sweater candle cozie project created by the ingenious Stephanie Lynn at Under the Table and Dreaming.

All it involves is recycling some old sweaters (or in my case, buying one from the thrift store) by covering the candle vase in a comfy sweater. Here is what mine turned out like:
Do you like it? I am in love with it! Small changes like this can really warm up a space, as well as turn generic candles into unique, stylish ones. I think it's the perfect project for these snow-filled days.

One thing I did differently than Stephanie Lynn is that I sewed my sweater into place rather than hot gluing it on. The reason being that I know I will want to change out the look of these candle vases later, so as usual, I only made a temporary change. I will be able to slip off the sweater covers and store them away as spring approaches, but I will be able to reuse them next winter. Perfect!

Sewing them was actually really easy. I only had to make around 3 rows of stitches.

Here is the original sweater. I picked it up at the thrift store. I was able to use it for two different projects and even had some left over. Not too shabby for $7.
First step was to slip a sleeve over the candle vase. Then I cut the piece to size, trimming the edges of the candle vase base as I went.
The only thing left to do was to sew this gap in the sleeve. That took about 30 seconds.
One down, two to go!
I did the same thing as before, but this time I made the sweater cozie for the candle rather than the vase. (Tip: If you do this, make sure the sweater won't catch on fire when you light the candle!)

For the round vase, I simply stretched the other sleeve over it. That way all I had to do was make the same few stitches to the top of the sleeve. I also had to make a few stitches to the bottom of the vase in order to wrap the sweater underneath the vase. If I had not done this, the bottom would have looked too frayed.
It turned out to be my favorite! :)
Here are the sweater candle cozies in my table centerpiece:
What do you think? Have you made any cool things with cable knit sweaters? Have you tried this project before? Please do share. :)
Photobucket

I'm linking to...
UndertheTableandDreaming
The DIY Show Off


10.26.2010

I've been featured at Polly Want A Crafter!

I am thrilled to let you all know that Cassity is featuring my dog silhouette pumpkins today over at Polly Want A Crafter!  I am so unbelievably honored! If you haven't been by her blog before, you should definitely check it out for some great craft tips and inspiration. She also has a blog about home design and remodeling projects - have you heard of it? Duh! Of course you have! It's the one and only Remodelaholic! So, to reiterate, I am so happy and grateful that she featured my project! It just keeps me motivated, ya know? 
Thanks for stopping by! :)

10.16.2010

Seasonal Decor

Hi everyone! Just thought I would share with you my seasonal table centerpiece. 


Here it is!

What do you think? Should I rearrange anything? This is the first table centerpiece that I have put together, so it was difficult to know where to put everything or know whether I had too much stuff or not enough...? Anyway, I'm fairly happy with it. :) After Thanksgiving, I'm going to move some of these pieces to other parts of the house. For example, the decor balls are going to fill a beautiful silver bowl that we have in our bedroom. 

Did I mention that I got almost every item you see for around $1? The glass hurricanes were from Dollar Tree. I found this awesome idea at 320 Sycamore. It is crazy simple but so genius! You just hot glue a glass vase and clear candlestick holders together. It took probably 5 seconds and cost $2.

I also dressed up the candles with a bit of yarn spun around the base. You could hot glue the yarn to it, if you're going for a permanent candle makeover. I, on the other hand, like temporary makeovers because you never know when I'm going to get bored with this look and want to try something else. Hehe.

As for the decor balls, I have seen a lot of different looks created by DIYers. All of them are fantastic, but I was too impatient to go look up a tutorial, so I just grabbed some yarn and started covering these styrofoam balls, which are 50 cents at Dollar Tree. It's so easy. You just dab a little hot glue onto one end and then start twisting it around like so.


It becomes more difficult the closer you get to the end, so you might have to use some more hot glue. (Be careful! I burned myself a couple of times.)

In the end, though, it will be worth it because you will have this cute little decor ball. :)

I'm linking to these lovely blog parties:
 Frou Frou DecorRemodelaholic FridayCraftomaniac Monday, You're So Very Creative @ Me making Do, Fall Festival @ DIY Show Off


10.04.2010

Dishwasher magnet!

So, here is a little project I worked on today.

It was super duper easy and took maybe 15 minutes, and that was because I was working slow. I found the idea for this dishwasher magnet at Joy is at Home. As soon as I saw hers, I knew I was going to make one. Hence, why I HAD to make this today rather than some other day when I might have had some downtime. Ha ha...I'm starting to realize how impulsive I can be.

So, it was really easy, as I said. You just need these materials : Mod Podge, scissors, 2 different types of scrapbook paper, letter stickers for the words "dirty" and "clean", ribbon, a magnet, and maybe a flower sticker for the middle like the one I added.

Some of the materials you will need

Scrapbook paper
Also, can I say this project was free? Technically, I did have all of the materials on hand, so that counts, right? Even if you have to go out an buy the materials, this project would still only cost around $2. Another reason to love it!

So, you will trace around the CD and cut out the scrapbook paper. Then, apply your Mod Podge to the paper and adhere it to the CD. Make a smaller circle for the middle (I traced mine with a mug), and adhere it to the CD as well.

Next, add some ribbon across the middle of the CD.


Then, add your letter stickers to form "clean" and "dirty" on opposite sides of the ribbon line.

Lastly, you will want to adhere the magnet to the back of the CD. (By the way, the magnet I used was one that had been on a magnet list pad that I was about to throw away. It was the perfect size.) I tried using Mod Podge for this step, but alas it failed. Joy is at Home also had some trouble using a glue gun. She ended up attaching the magnet with Gorilla Glue. I didn't have any of that laying around, but weirdly enough I did have some Welder contact adhesive in my craft drawer. This is the heavy duty stuff that has warning labels all over it. Haha! Oh well, all I can say is it worked!  :)


Have a great day!

(P.S. After I wrote this, I realized how dumb I must sound to spell out the steps for you. It's pretty self-explanatory.)

I'm linking to...


Make It for Monday @ Cottage Instincts


The Girl Creative

9.25.2010

One lovely blog - passing the award along!

I received a blog award yesterday! Can you believe it? Sometimes I'm not sure whether I am just writing to myself or if anyone finds my projects and tutorials worth reading about, so that is why I am so honored that Big Mamma's The Bristol Project passed this award along to me. 


Wasn't that so sweet of her? You should check out her blog. She has some great content and a great sense of humor (which makes it all the more fun to read!). She writes about recipes, weight loss, projects, and family. 

The way these blog awards work is that, once you receive one, you pass it along to other deserving bloggers, so here are my choices in no particular order:

  1. This Thrifty House is definitely one of my favorite blogs that I follow. Reading about the DIY projects Sharon completes while on a budget (as most of us are) has been truly inspirational - in fact, her blog was the one that inspired me to start my own! She has so many innovative and interesting projects with great before and after photos. If you haven't already, you should definitely check out her tutorials.

  1. Just Another Day in Paradise is another great blog. Desiree has a lot of great posts on her new projects and home décor. She has a chic decorating style that I LOVE! You should check out the beautiful photos of her home and her projects on her blog - there is no doubt they will inspire you!

  1. Thrift Store Decor Junky is another blog I have repeatedly found myself going back to. Suzanne posts about DIY projects, many of which involve thrift store furniture makeovers (and everything else in between). She has great before and after pics, too. She also hosts a link party (which I have not joined in yet, but I've been meaning to!)


 Hope everyone is having a great weekend! Thanks for stopping by!

9.16.2010

Slipcover inspiration!

Sofa slipcover from Beck's Chic Life

I am so inspired by this slipcover that Rebecca at Beck's Chic Life made. She is a self-proclaimed elementary sewer (yeah right!), which is what sort of gives me hope that I can make a slipcover for my sofa and loveseat. I have had some trouble with my little sewing machine lately {tear, sniff, sniff}, so do you think I could stitch witchery a sofa slipcover? Wait, that's stupid, right? Yeah, I guess it is. Ha ha...I was just kidding...(not).

Here is a before and after of her slipcover. I am so impressed that this is the first slipcover she has made.

Before:

After shot of the back:


You can see more photos on her blog: Beck's Chic Life

8.24.2010

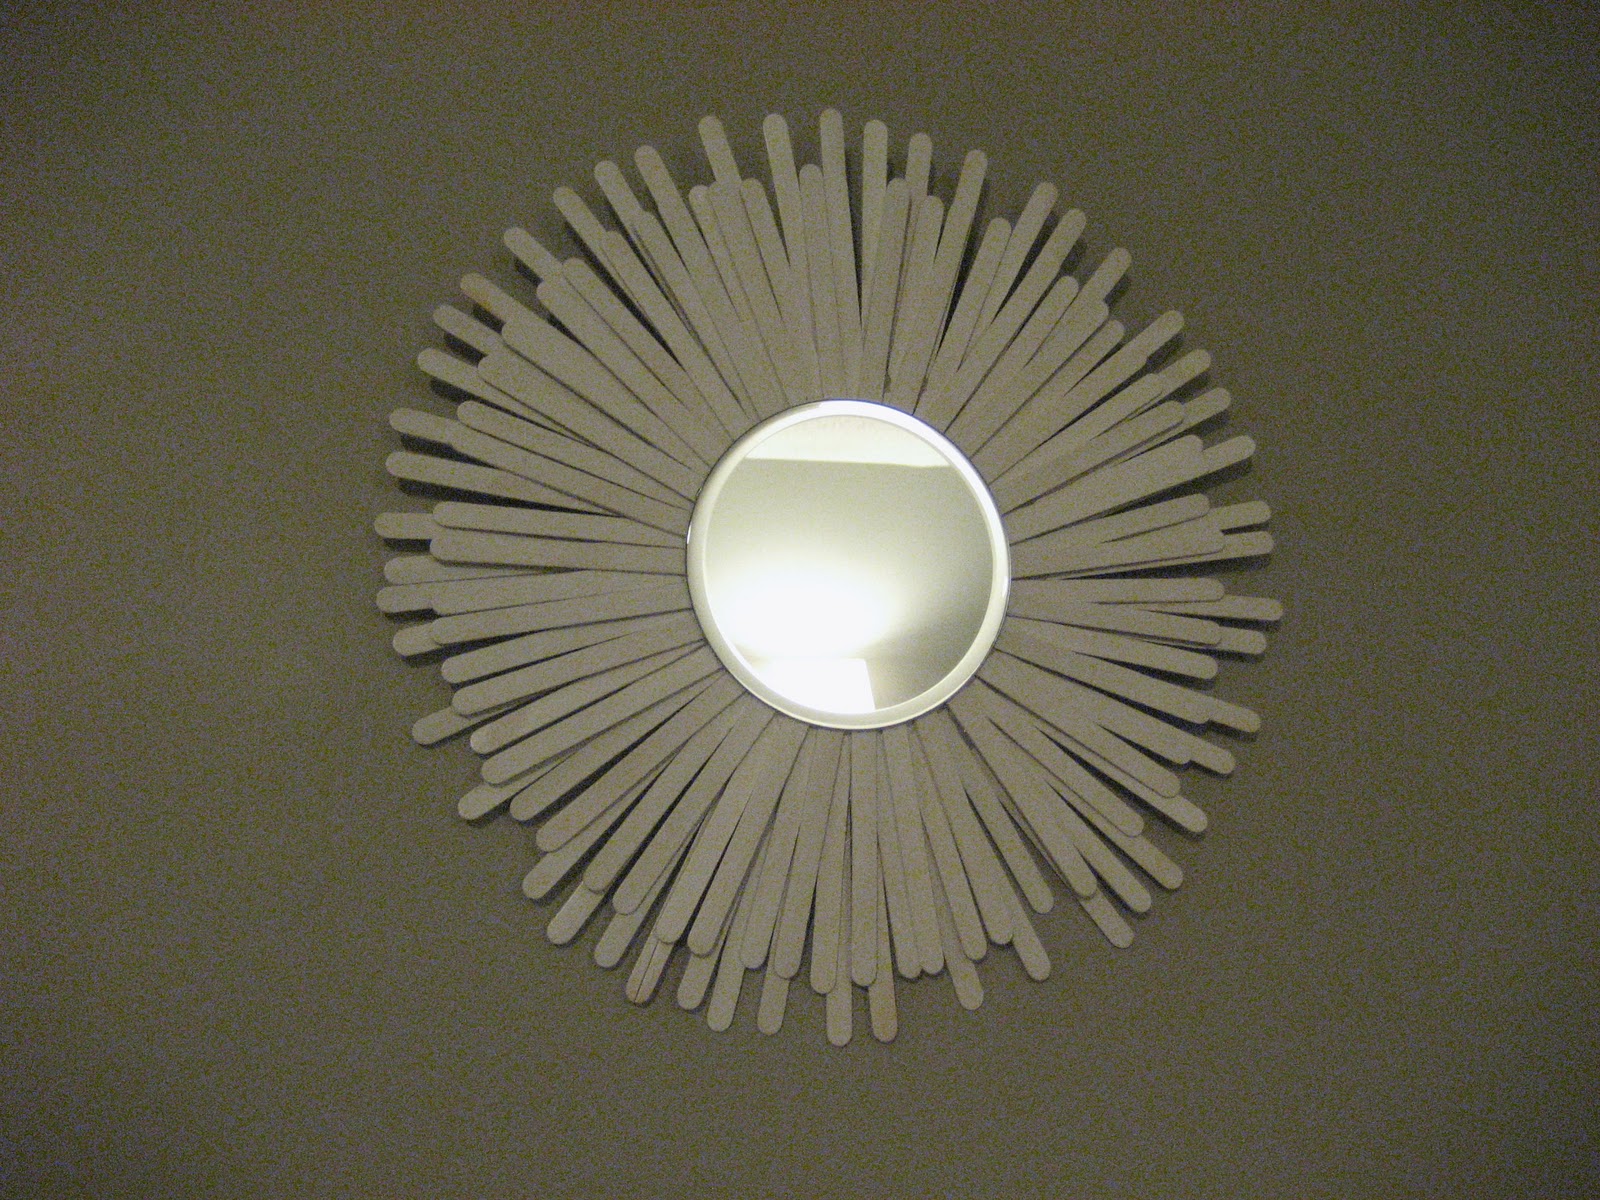
Tutorial: How to make a $2 version of the starburst mirror

$2 decorative mirror

So, remember this mirror that I referenced in a post earlier this month?


I found it on Crafty Nest, and it totally inspired me to make my own version. So, I popped over to Dollar Tree again, and I found some materials to make my own version. Mine is smaller and, admittedly, not as stunning as the starburst mirror. But for a mere $2 and 30 minutes (which hardly even counts because I was simultaneously watching a movie with the husband), I am pretty pleased with the results. :)

My version
Materials
  • Small mirror ($1)
  • Package of popsicle sticks ($1 - I'm going to say my package of sticks contained 100, but that's just a guess.)
  • Spray paint (I used some leftover white Krylon Fusion; it doesn't take much.)
  • Hot glue gun with glue sticks (Already had on hand, but for those who do not have one, I believe they run maybe $5.)