
My bathroom cabinets were looking a hot mess, so I decided to do something about it last weekend. Because my husband and I are still renting, it's not like I could take them in some creative new direction, so I just gave them a new coat of wood stain to give them a refreshed look. And the result you ask? They turned out more gorgeous than I could have imagined! I also looked into new hardware, but have you seen how expensive hardware can be? Ouch! Instead, I took my trusty old spray paint and painted those cabinet pulls, and you know what? I love them now!


By the way, these pictures really don't do these cabinets justice. It totally transformed the look of the space.
Here is what my cabinets looked like before:


{Shutter}
Materials
- Stain (approx. $12) This will last you forever. The amount of liquid in the can went down by maybe a centimeter by the time I was finished with it.
- Flat-edge paintbrush ($5)
- Dropcloth ($1) or cardboard boxes flattened.
- Acrylic paint and brush ($2) (optional - for damaged wood)
- Sanding tool ($3.74) (optional - are you gonna be a square and play by the rules or do it the fun way? Just kidding.)
Time - approximately 2 - 2.5 hrs
Step 1 - Wipe your cabinets clean. Then, sand them down...or not. I started sanding the cabinets, but then I tested out staining a sanded portion and a non-sanded portion and there was no difference, so I tossed the sand paper sponge and kept staining.


Part of the reason why I did this was because...well, I'm impatient. I can admit that, but there was another more legitimate reason for skipping a step: I was losing brain cells by the minute from breathing the air while I had the stain out. Sanding makes the process take longer and, therefore, more brain cells would have been lost. Plus, I know I was inhaling the particles that flew up into the air while sanding. Brain cell depletion + lung cancer = double whammy! No thank you. I'll risk having crappy cabinets instead.
But luckily, the cabinets still turned out great!
Step 2 - Dip your flat edged brush into the stain. Only dip the edge in, and let most of the stain drip off and also wipe the excess on the edge of the can.

Remember: The more stain you use, the longer it will take to dry. Mine took about 24 - 30 hrs to dry completely (yeah, I used too much I think).
Step 3 - Paint your cabinets with large strokes without overlapping previous strokes. Or go with the grain of the wood. I think that's what the pros say.

I only used one coat, but it will depend on your cabinets and how thick you are applying the stain.
Tip: Work fast! As I said earlier, the smell is noxious and you might feel lightheaded if you inhale it for too long. I recommend opening up your windows and possibly blowing a fan toward the cabinets and away from you.
Step 4 - If your cabinets have water damage or some other kind of damage that splits the wood and makes it bubble out, then you too might want to try this step.
This is the damage to which I am referring. It was U-G-L-Y...it ain't got no alibi! It's ugly..yeah, yeah, it's ugly. (Sorry about that. Couldn't help it.)

So, I decided to match my cabinet color to some acrylic paint. I found some in a dark brown shade that was a close enough match that I didn't have to do any mixing.
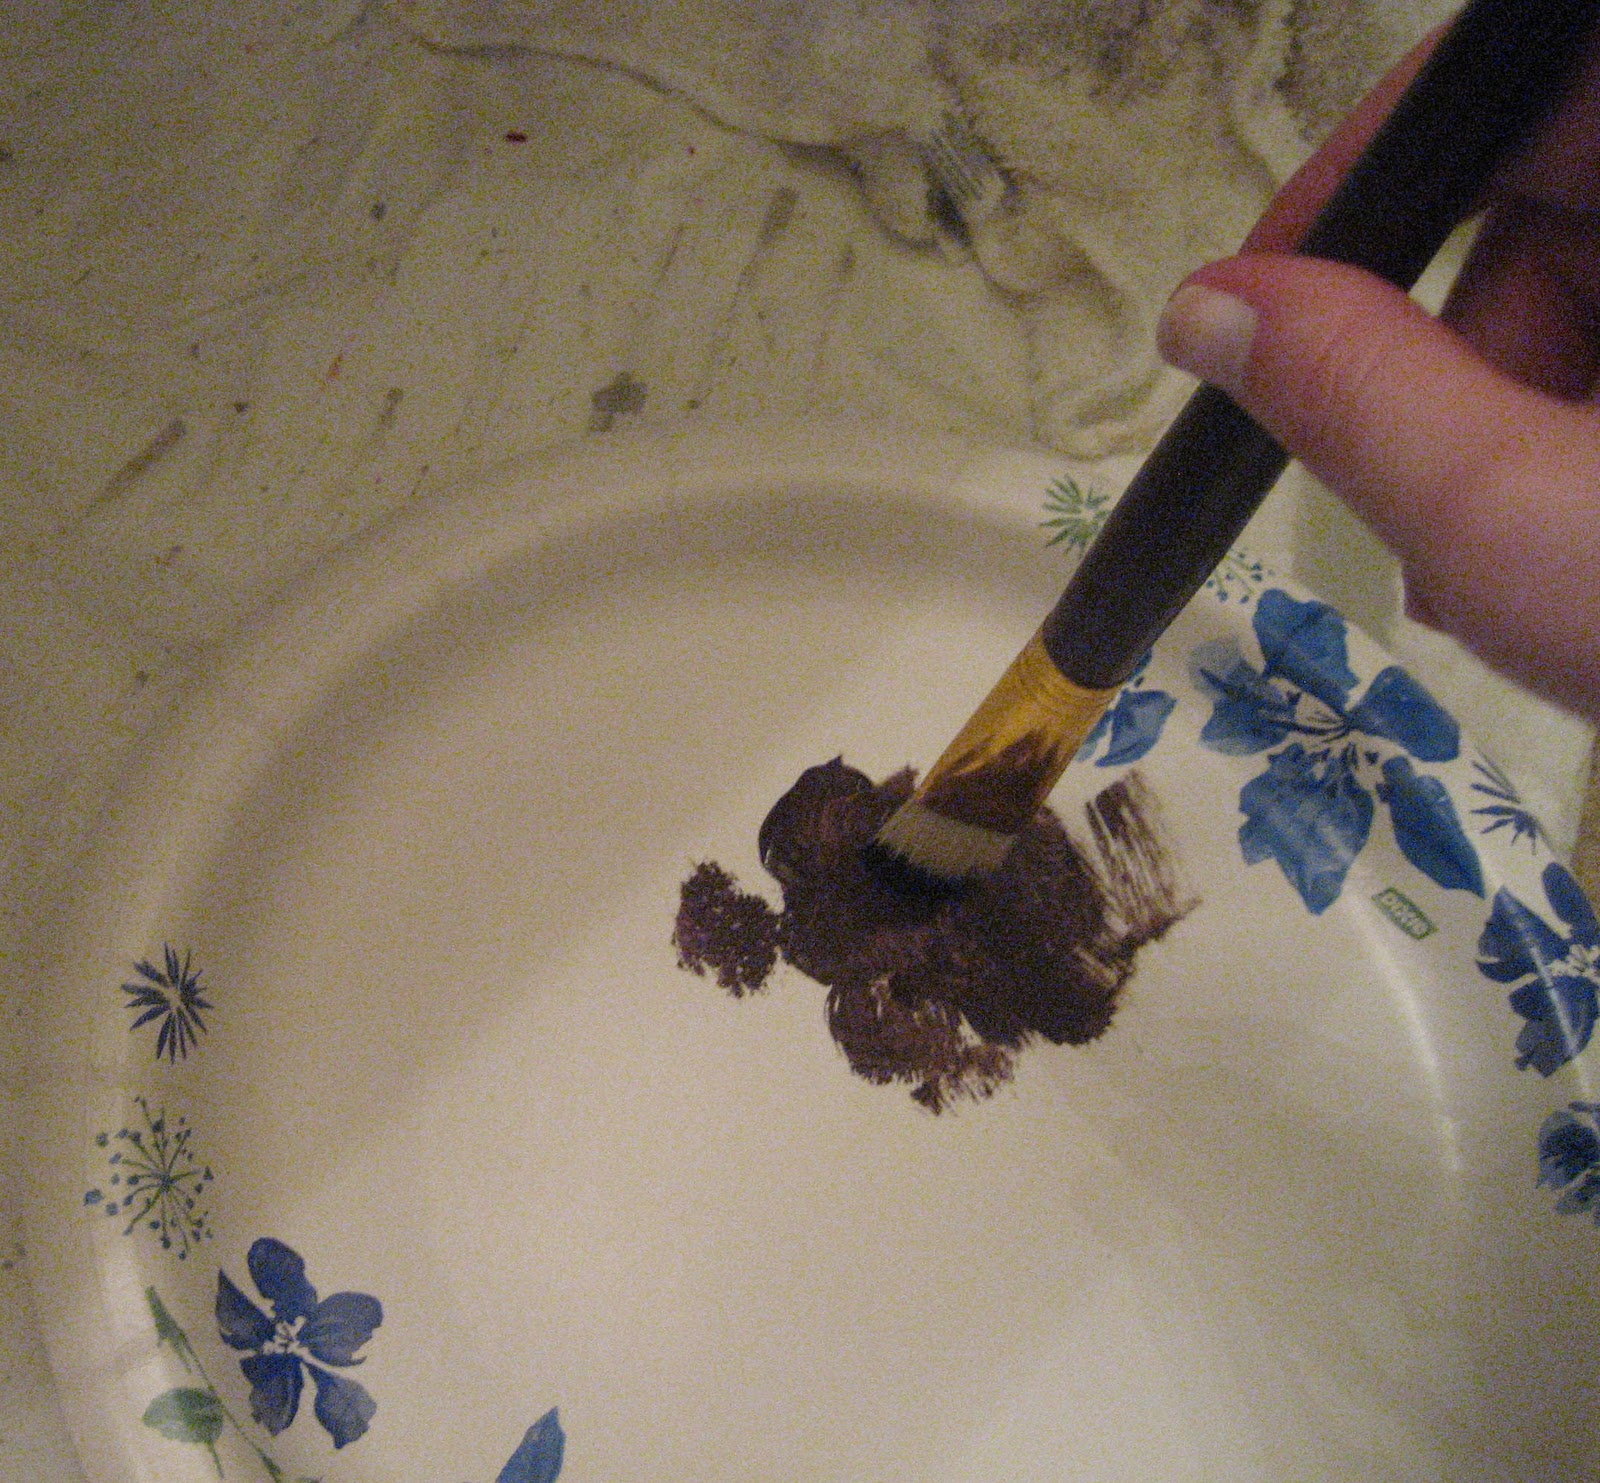
I got out a cheapo large paint brush and dipped the bristles head first into the acrylic paint. I applied it that same way to the cabinets. That is, I didn't brush on the color (because it would get too much paint on the cabinets). Instead, I poked at the rough, damaged spots with the head of the brush. That helps get all of the paint into the nooks and crannies of the damaged wood.

I must say that it disguised it really well! I can only see it if I look really closely.

Note that this may not work on cabinets that are exposed to direct sunlight (like by the kitchen window), because I feel like the harsh light of day would be unkind to these hidden painted spots. I think you would be able to tell that there is something different about those spots. But it is still probably better than leaving damaged areas as they are now.
Step 5 - Spray paint the hardware like I did. I figure I can just use a bronze spray paint to change back to their before look for whenever I get ready to move.
Check out the before:

And here is the after!
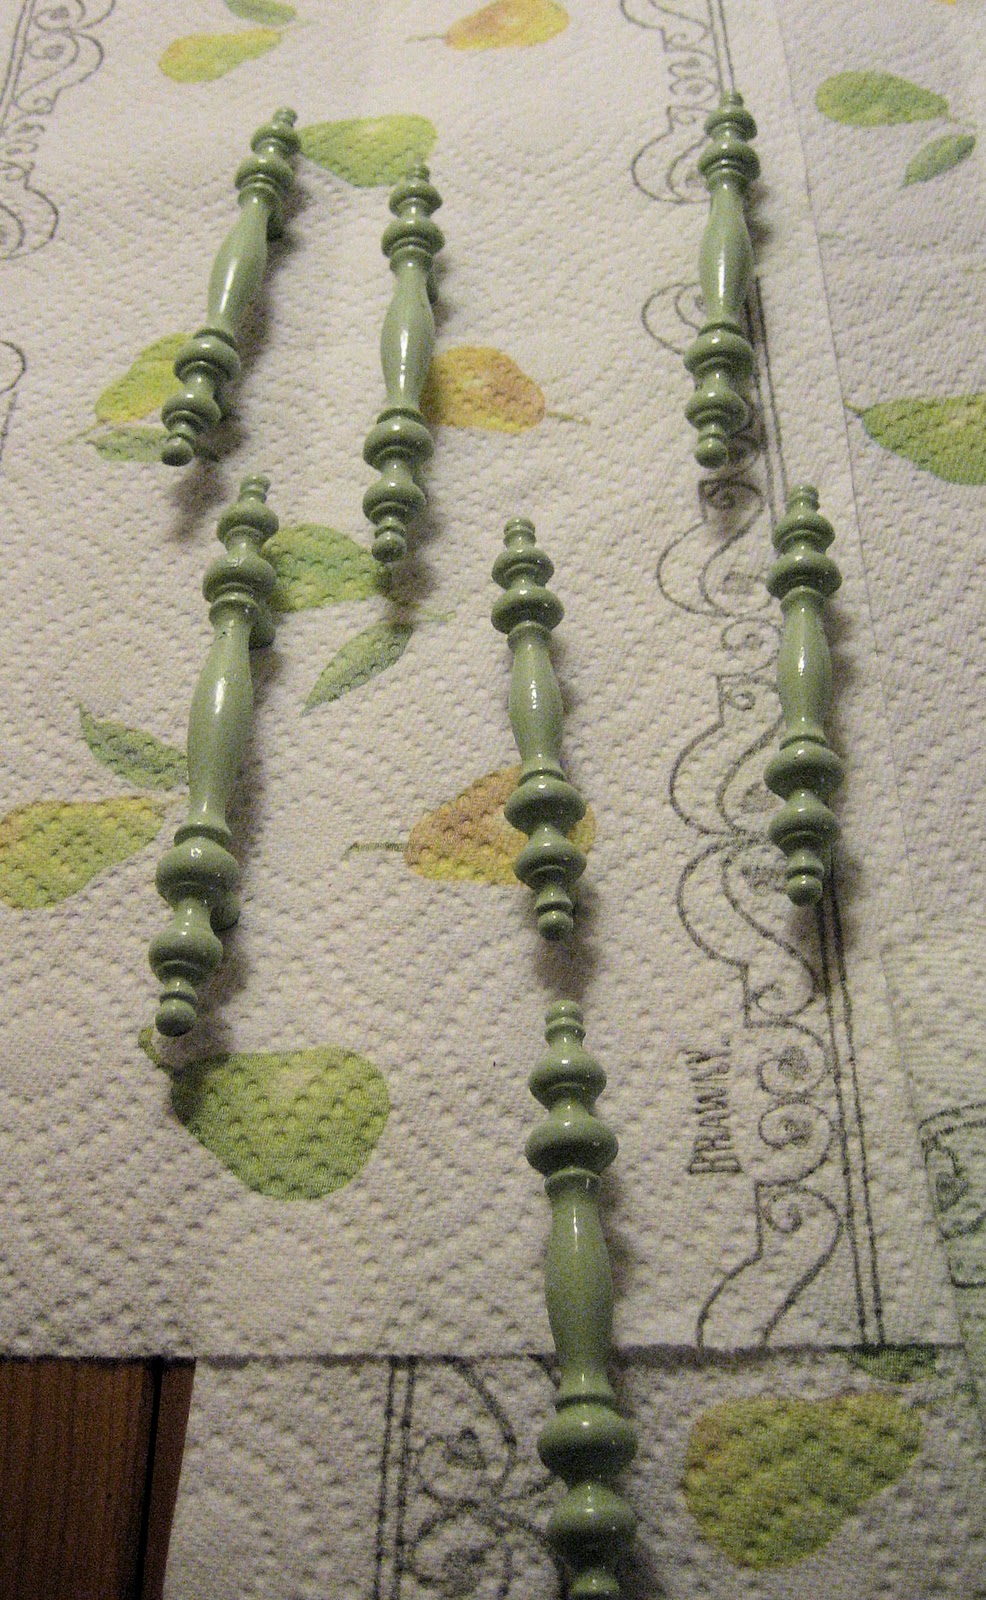
I used Celery from Krylon Fusion, by the way.
Once again, let's see that dramatic before and after shot of the cabinets.
|
| Before |
 |
| After |
Yay for happy cabinets!!!
P.S. I'm linking to Paisley Passions Thrilling Thursdays, Our Shabby Chic Villa, and...


Very Nice! They came out so great. Aren't you talented!
ReplyDeleteYou should come join my linky party :)
http://shabbychicvilla.blogspot.com/2010/09/my-first-linky-party.html
They turned out great!!! What a fun before and after! Thanks for sharing your “creative mojo” with me on Thrilling Thursday. I hope you will be back again soon :)
ReplyDelete~Lori S.
Thrilling Thursdays @Paisley Passions
This is one awesome looking makeover you did here on these cabinets and you are only renting...how sweet of you!
ReplyDeleteBlessings,
Linda
Thanks so much for your kind words! It encourages me to keep posting. :)
ReplyDeletei think you did a great job in renovating these cabinets, they look absolutely transformed and just too good, you have renovated your cabinets just the right way for a perfect bathroom
ReplyDeleteThanks, Henna!
ReplyDeletegreat bathroom decor, i love the way you have renovated your bathroom, it makes the bathroom look so beautiful and classy
ReplyDeleteI see so many post about painting cabinets...but I love what you have done to yours with stain. A total transformation - Thanks for the tutorial and for sharing!
ReplyDeleteThese turned out great! I love the dark wood tones with the green handles! Such a nice contrast! Great job! I'd also love it if you linked up to my link party going on now! http://alittleknickknack.blogspot.com/ Have a wonderful weekend!
ReplyDeleteThanks for your kind words, ladies. I really appreciate it.
ReplyDelete@Meg - Thanks for the invitation! I will link up right now.
They really look great. I love the celery color you used on the pulls.
ReplyDeleteWow! If you had any idea the way my cabinets look, you'd totally want me to do mine too! And I do! I have to talk to the hubby, but I thought yours turned out great!!
ReplyDeleteThank you! I can't wait to stain my kitchen cabinets - I just need to find the time to do it. See how bad this before shot is of my bathroom cabinets? Now picture that but about 10 times worse.
ReplyDeleteThank you for the info. It sounds pretty user friendly. I guess I’ll pick one up for
ReplyDeletefun. Thank u.
Bathroom Cabinets
The cabinet looks better now. It's very hard transforming a cabinet into a gorgeous one! Congrats! You've done a great job! I really love the new look of the cabinet.
ReplyDeletenice, both my baths and my kitchen def need an update. thanks for the post
ReplyDeletehttp://shaejus.blogspot.com/
Have a very good Organized Bathroom Cabinet blog. I really appreciate you for this good work keeps it up. You can also find a very good blog at Prodigg.
ReplyDeleteThis is nice. Thanks for sharing! I have been wanting to do a luxury bathroom vanity in chicago il for my house. I think your ideas will help.
ReplyDeleteWow! you have made your cabinets too good.
ReplyDeleteBaths Vanities
You thought really nice to renovate your bathroom.
ReplyDeleteHome Design Plus
Very beautiful blog thank you so much for this blog...
ReplyDeleteWooden Bathroom Cabinets
Thanks for sharing valuable information. Choosing the best bathroom accessories Melbourne give an authentic look to your home. Find the best toilet suites and Bathroom Vanities Melbourne in Best N Buy.
ReplyDeleteWow, you did a good remodeling job. Pinned your blog for reference.
ReplyDeleteReference: bamboo flooring in kitchen or bathroom
I have read so many articles or reviews regarding the blogger lovers except this paragraph is truly a good post, keep it up.However, if you want to buy a custom logo click here.
ReplyDeleteonline logo
To achieve this, you'll need to find the right bathroom furniture to neatly organize all the bath essentials.
ReplyDeleteURL: topbathroomrenovationsmelbourne.com.au/
This bathroom vanity is so beautiful it makes me almost forget how badly I need to get on the kitchen and bathroom. contact us
ReplyDeleteHow do I change the look of my bathroom cabinets?
ReplyDeleteWebsite: www.bathroomrenovationsperthpros.com/
My bathroom cabinets were looking a hot mess, so I d'ecided to do something about it last weekend. Because my husband and I are still renting. https://bathroomrenovationsperthpros.com/
ReplyDeleteInteresting and useful post, thanks for the share.
ReplyDeleteLaw Coursework Help