Showing posts with label sewing. Show all posts

3.03.2011

Guest Bedroom: Before & After

I am finally getting around to posting my new and improved guest bedroom. It is by no means finished since I'm always wanting to change things, but it is much better than the ugly, mismatched look we had going on before.

It's actually an inviting and serene place now, where I can get stuff done (it's also our work space). In addition, I am no longer embarrassed to have guests stay in there. And we do get quite a few guests because J and I live in NC but we are from OK, so family and friends come to visit us, which we really appreciate!


Are you ready for it? Here are some BEFORE pictures:


Do you see the sweet little dog sleeping on her blanket? Love her


Now for some AFTER pictures. Sorry they are so dark! (It's weird how natural light makes a room look darker in pictures than it really is.)


Here are all the things I did to the guest bedroom:

1. Painted the room
5. Covered the lampshade on my desk with pretty fabric
6. Made a cork lamp base, but have since replaced it
7. Created a starburst mirror for $2
10. Spray painted and reupholstered the desk chair
17. Made some easy & inexpensive wall art

What do you think? :) Thanks for looking!

Photobucket

1.20.2011

Pretty Placemat Pillow

So, I haven't posted anything in a while, but thanks you guys for sticking with me! I am so pleased to see I have 82 followers!! What the what?! And many of you leave me lovely comments too. It brings so much joy to my little heart. <3

Just because I haven't been posting doesn't mean that I have not been gettin' busy with some projects, though I must admit I've slowed down. This project I'm going to share with you today is probably not even worth posting, but I am still kind of proud of it because I sewed something. That's right. I sewed something with a sewing machine! If you all are familiar with any of my projects from the past,  then you might have noticed that I tend to use stitch witchery or other iron-on tapes. Well, NO MORE because my amazing parents gave me a big girl sewing machine as a gift. It's the real deal, folks. I should have taken a pic just to prove it. But I digress...  

The project I am sharing today is a placemat pillow I sewed for the sofa. I have seen lots of these lovely pillows around blogland, so I had to try one myself. Here it is:

All you need is...
  • 2 pretty placemats -- I bought mine from Target for $3 each.
  • Stuffing -- I got this ingenious idea from This Thrifty House. You buy an inexpensive pillow (like mine was $2 from Walmart), and then you cut it open and use the stuffing. This is usually cheaper than buying stuffing on its own.
  • Sewing supplies -- because the placemats are fairly thick, I would not recommend sewing this by hand.   
Because my placemat had pretty details on the sides, I sewed the 2 pillows together right side out, which is why the seams are visible. That may have been a mistake -- it looks sort of messy. 


Have you all made placemat pillows before? How did yours turn out?
Photobucket
I'm linking to...

Thrilling Thursdays @ Paisley Passions; Hookin' Up with House of Hepworths; Under $100 link party @ Beyond the Picket Fence

****************************************************************************************
All the ideas and opinions expressed are my own. No monetary compensation was received for doing this post, however, I was provided with a discount code.

12.08.2010

Warm and Comfy Sweater Pillow!

I had quite a bit of leftover cable knit sweater from my sweater candle cozie project, so why not make a pillow cover? Sweater pillows have been popping up in home decor stores as well as all over the blog world lately. And I can see why because they give you a warm comfy feeling whether you are resting your head on one or just staring at your handmade sweater pillow in admiration. 

Here is how mine turned out:

It was soo easy to make, even without a sewing machine! I simply placed my pillow form inside the body of the sweater--luckily, it was a perfect fit--and then cut one side and hand sewed two of the sides. 
I didn't turn the sweater inside out while I sewed, so it has kind of a rough edge. I'd like to say I did that for some creative unique reason, but honestly, I just wasn't really thinking. It's not bad, though! 
P.S. The husband really liked this one! That's saying something because his enthusiasm for my projects has waned recently, probably because I tend to strew unfinished projects throughout the house, not wanting to put them away until they are completely finished. Haha...oops! At least he's a good sport about it. I can make this one of my many New Year's resolutions.  

P.S.S. My little Heidz approves! She is an expert on all things comfort-related, so I value her opinion highly. (I am not crazy, I promise...okay, maybe a little dog crazy.) 
She was wearing her Christmas sweater because we just got back from taking our family Christmas portrait. Some dogs may feel humiliated when their owners make them wear clothes, but Heidi LOVES a snug little tee or sweater.
I also need to throw in a pic of my other cutie patootie, Jini. Otherwise, I would feel like I was leaving her out .
Yes, that is a leopard print Snuggie and my fleece jacket that she is laying on. She is my other comfort expert, if you can't tell. ;)
Photobucket
Thanks for looking! Check out these awesome linky parties:


Fine Craft Guild


12.05.2010

Sweater Candle Cozies {tutorial}

We got some lovely snow yesterday here in North Carolina. The snow came down in big soft flakes - it was beautiful! It was the perfect opportunity to stay indoors and do a winter project. I've been dying to try this sweater candle cozie project created by the ingenious Stephanie Lynn at Under the Table and Dreaming.

All it involves is recycling some old sweaters (or in my case, buying one from the thrift store) by covering the candle vase in a comfy sweater. Here is what mine turned out like:
Do you like it? I am in love with it! Small changes like this can really warm up a space, as well as turn generic candles into unique, stylish ones. I think it's the perfect project for these snow-filled days.

One thing I did differently than Stephanie Lynn is that I sewed my sweater into place rather than hot gluing it on. The reason being that I know I will want to change out the look of these candle vases later, so as usual, I only made a temporary change. I will be able to slip off the sweater covers and store them away as spring approaches, but I will be able to reuse them next winter. Perfect!

Sewing them was actually really easy. I only had to make around 3 rows of stitches.

Here is the original sweater. I picked it up at the thrift store. I was able to use it for two different projects and even had some left over. Not too shabby for $7.
First step was to slip a sleeve over the candle vase. Then I cut the piece to size, trimming the edges of the candle vase base as I went.
The only thing left to do was to sew this gap in the sleeve. That took about 30 seconds.
One down, two to go!
I did the same thing as before, but this time I made the sweater cozie for the candle rather than the vase. (Tip: If you do this, make sure the sweater won't catch on fire when you light the candle!)

For the round vase, I simply stretched the other sleeve over it. That way all I had to do was make the same few stitches to the top of the sleeve. I also had to make a few stitches to the bottom of the vase in order to wrap the sweater underneath the vase. If I had not done this, the bottom would have looked too frayed.
It turned out to be my favorite! :)
Here are the sweater candle cozies in my table centerpiece:
What do you think? Have you made any cool things with cable knit sweaters? Have you tried this project before? Please do share. :)
Photobucket

I'm linking to...
UndertheTableandDreaming
The DIY Show Off


10.19.2010

Tissue Box Cover {tutorial}

Do you ever find yourself at the store in the tissue box aisle trying (albeit unsuccessfully) to pick out the box that best matches with your décor?  But then it never seems to match when you bring it home? You try so hard to make everything else pretty, but somehow this unsightly yet necessary item has slipped through the cracks. Well, my friends, it is time to take back your room. Let's make this box fit in with all of your other beautiful things. But let's do so without resorting to bulky cheap-looking plastic covers. Maybe if it is in your budget, you can buy a sleeker and more attractive cover. But on my student-sized budget, I needed to look for another solution.

How about a cute fabric tissue box cover?  Yes please!
So, I have seen fabric box covers before, but honestly the ones I have seen have looked a little sloppy. (Trust me, though, I know mine is faaaar from perfect.) I'm pretty happy with the way my turned out. At least to me, it does not look sloppy, and here is why: (1) I used clasps on the bottom to give the box a nice tucked-in look, and (2) I used Heat 'N Bond light to line the fabric.

Thanks so much for looking! Stick around in case you are interested in making one  yourself.

                   Materials
  • Fabric (I got mine on clearance from Jo Ann's for around $3 or $4/half yard. I love it and have used it here and here. )
  • Heat 'N Bond light weight iron-on fusible interfacing (around $2, I think)
  • Scissors (on hand)
  • Ruler or measure tape (on hand)
  • Needle and thread if you're sewing by hand like me (on hand)
  • 2 Clasps (< $1)

                   Time - approx. 2 hrs (less if you own a sewing machine)

Step 1 - Trace one side of your tissue box, adding half an inch to each side. Cut that piece out and make 3 exact copies. Trace the top of the box onto the fabric - that shape is slightly different.

TIP: If you have an empty tissue box, cut the bottom half off, and then use the opening on the top as a template to trace the oval onto your top square of fabric and then cut it out. (Oh and I totally didn't do that part, but it sounds like a good idea. My oval is a little imperfect.)

Step 2 - Iron the Heat N Bond light weight interfacing onto the backs of the fabric rectangles. As I mentioned before, this is part of what I think makes the tissue box cover look sharper and less slouchy. Then cut off the excess like so…

Step 3 - Fold down a half inch on each side of the fabric rectangles and then iron down. (see below)

Step 4 - Simply sew the edges of the rectangles to the top square piece. Until you get something that looks like this…
Jini wanted to get in the pic, too.  :) Heidi, my other dog, was sitting next to her momma. {love them!}

Step 5 - Sew the sides of the rectangles together the same way until you have the basic form. You're almost done! :)

Step 6 - Cut out some strips of fabric and sew one to each side of the bottom of the cover. Now, attach a clasp by sewing it each part of the clasp to the strips of fabric on opposite sides like so…

Insert your tissue box and attach the clasps together on the bottom. There you go! Lovely! Much nicer and classier to display this than a normal boring tissue box. Yay! :)

The final pic once again. 

Here's another angle.

Thanks for checking this tutorial out! If anyone makes their own fabric tissue box cover based on mine, please let me know so that I can show it off here. Thank you!!

I'm linking to...
Weekend Wrapup @ Tatertots and Jello Show & Share Day @ Just a Girl Wordless Wednesdays Spotlight Yourself Blue Cricket Design We Did It Wednesday @ Sew Much Ado Show Us What You're Workin' With @ Me & My Bucket 100 Ideas Under $100 @ Beyond the Picket Fence Hoo's Got Talent @ Night Owl Crafting Look What I Made! @ Creations by Kara Creative Share Wednesday @ The Trendy Treehouse


9.06.2010

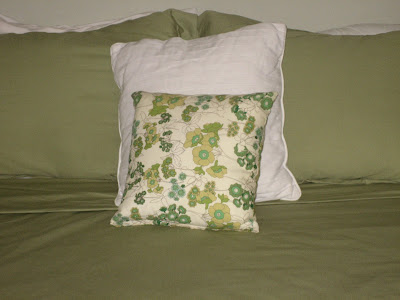
New pillow!

I made a simple little pillow for the guest bedroom, and just thought I would share. 

It's amazing how much interest it adds to a room when you incorporate a little bit of fabric print. I'm loving this green flowery and retro-ish fabric I got from Joann's. I found it on the clearance rack, by the way -- even better!

I was busy, busy this past weekend working on tons of projects, and I ended up using this fabric quite a bit. I'll post pictures and tutorials soon! Thanks so much for reading!

8.13.2010

Tutorial: How to make my version of the petal pillow

Yesterday, I was searching for some inspiration when I stumbled upon this lovely pillow by Cluck Cluck Sew.

Immediately upon seeing it, I knew I HAD to make one for our couch. I was so eager, in fact, that I headed directly over to Joann's fabric...after I finished up my work in the lab, of course. ;) (Okay, so maybe I didn't complete everything on my list.)

So, here is my version:

Mine doesn't make quite the same impact, but I think my pillow fits in well with the rest of the decor. It has a quiet elegance about it, I think, and the flower is the fun twist that catches your eye but does not hold it there. 


I am super impressed that Cluck Cluck Sew was able to make her pillow in 30 minutes, because my pillow took much, much longer. Although I'm a basically a novice when it comes to sewing (I got my first real sewing machine a few weeks ago), it's still pretty embarrassing how long it took me. Four hours. Yeah, I know.

Maybe it would have helped if my doggers hadn't viewed my sitting on the ground (cutting and sewing, mind you) as an invitation to play.

But who can say no to these two cuties?!


Someone - and I'm not pointing fingers -  thought the felt fabric I had laid out was for her.


Of course, they weren't always a nuisance - sometimes they tried to help momma out. Heidz even took it upon herself to hold the petals in place while I sewed rather than make me go to the trouble of sticking pins in them.


Okay, getting back to the pillow, here are the materials you will need:
  • 1/4 yard of felt ($3)
  • around 1/2 a yard of home decorating fabric ($5 @ $9.99/yard)
  • cups of various sizes (already own)
  • pillow (preferably an old one that you already own)
  • fabric pen ($2.99)
  • sewing machine or needle and thread (cost varies)
  • scissors (already own)

And here are the steps to make a pillow similar to my toned-down version, if you will, of Cluck Cluck Sew's design…although her pillow is fabulous and her tutorial can be found here

FYI - The main differences between our designs is that, for better or worse, mine involved substantially fewer petal, three petal sizes as opposed to two, and I hand stitched my petals.