Showing posts with label fabric. Show all posts

8.07.2011

Drab to Fab: Recovering a Lampshade with Fabric

Hello everyone! :) I should be doing edits to my thesis right now, but instead I've spent a lazy Sunday afternoon editing vacation photos on Picnik. J and I spent a lovely week at Masanutten resort in Virginia, and we just got back yesterday. Although we had an amazing week, we are glad to be back with the pups! 

Before I move onto the point of this post, check out this gorgeous view atop Bearfence Mountain:
Bearfence Mountain - Shenandoah National Park, VA
Breathtaking, isn't it? Okay, moving on...
Today I'm going to show you another lampshade makeover. (Perhaps you have seen my first lampshade recovering project here.) 

Here is the before:
It's just a plain white lampshade that I got from Target for, I think, $12-14. This lampbase has worn a lot of different shades in its day. If my memory serves me, I have switched out the lampshade with various ones around the house about 5 times in the last 2 years. Nothing was working, so that's why I decided to buy this one.

I have a recovering-a-lampshade-with-fabric tutorial here, in case you are interested. 

Here is the after!
I used home decor fabric from Joann's. I bought it over a year ago, so I don't recall the price. It only took maybe 1/4 yards of fabric. Not bad at all!

What do you think of the before and after?
I like it a lot more! I'm not 100% thrilled with the edges, however. I wasn't as careful as I was the first time I recovered a lampshade. Oh well...I still like it! I'm just happy that it adds a pop of color in the corner of the room where the walls are renter's white.  :)

Have you recovered a lampshade before? Any other lamp projects? 

Thanks for reading! Have a great day!
Photobucket
If you enjoyed this post, please consider liking 31 diy on Facebook.

6.20.2011

Reupholstering a Chair

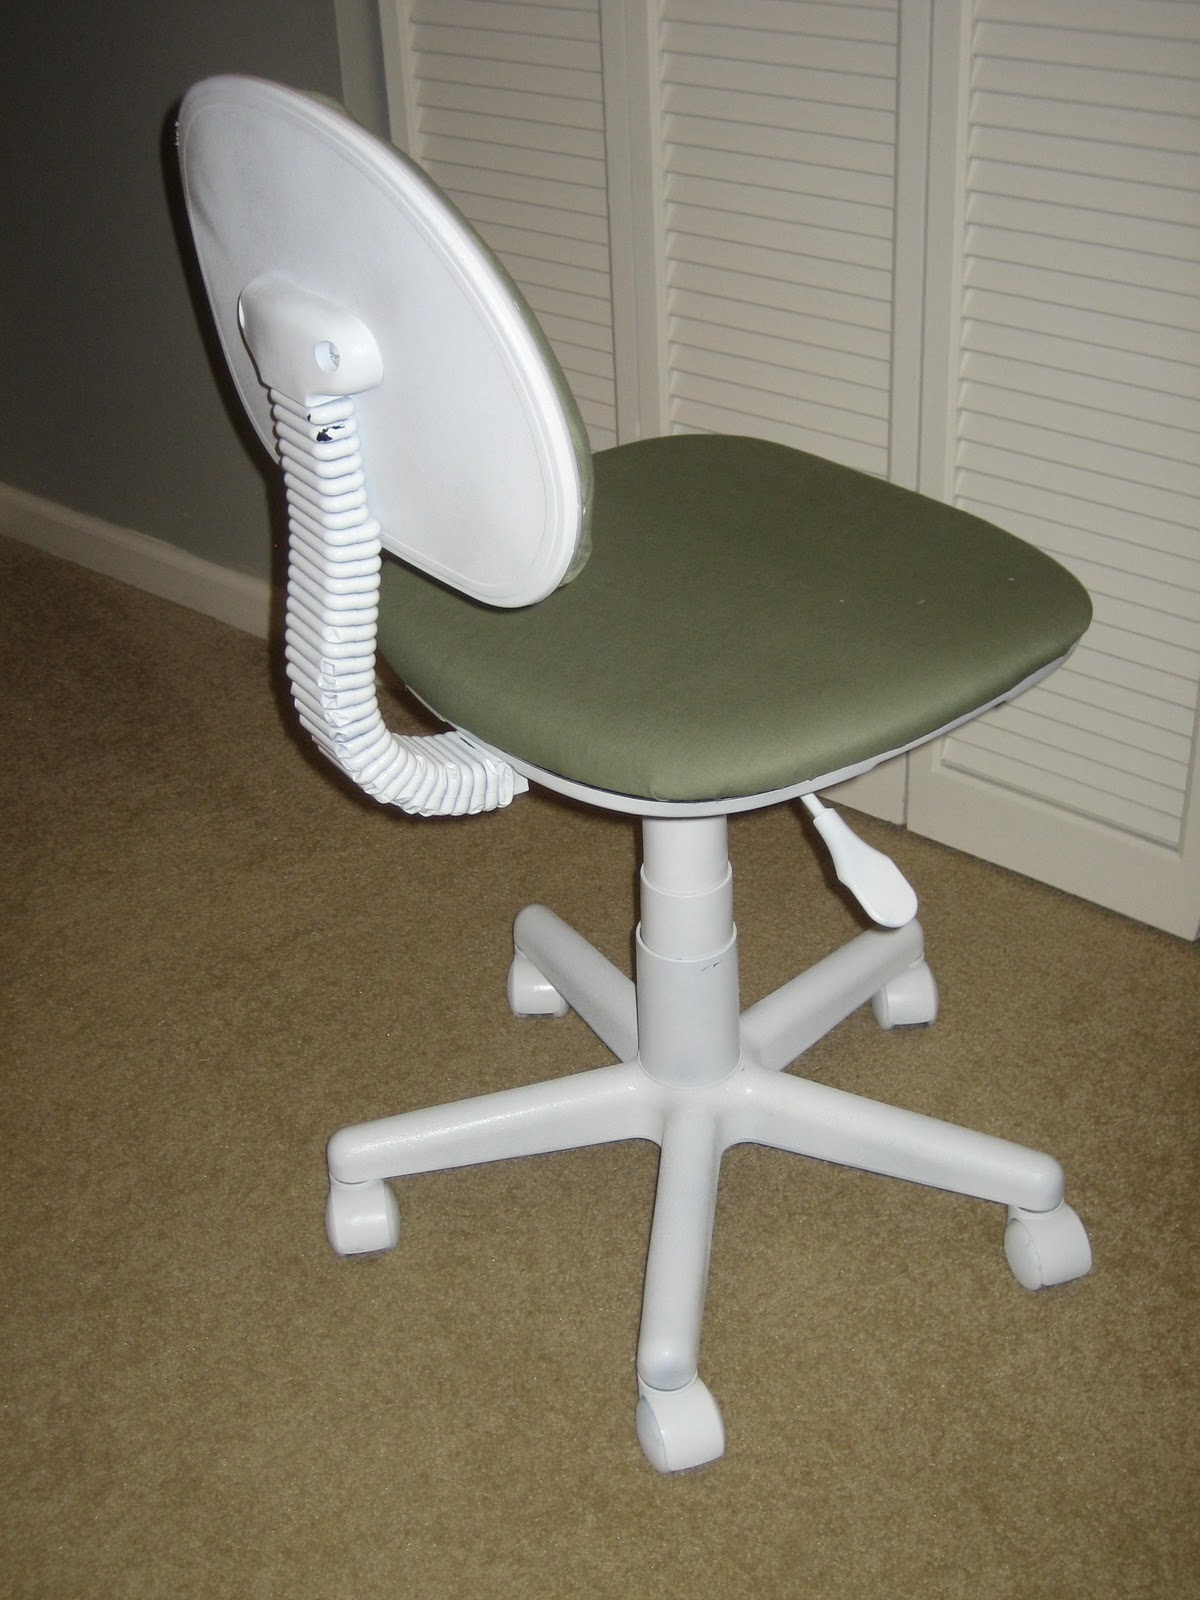
I've reupholstered a desk chair before, so I was up for a more challenging reupholstering job the second time around. I needed another one for the guest bedroom/study. I checked out Craigslist for a few days and found this beauty for $10.

Pic of the back (couldn't find a photo of the front).
It had seen better days - it was made in the late 70's after all (I found the date and manufacturer on its underbelly). It also wasn't the right colored fabric. But it had good bones, which is what attracted me to it.

Here is a tutorial that I wrote before about my last reupholstering job. I have one more little tip about how to get the corners taut, which is especially important when you don't have a plastic cover to tuck the corners into.

First, staple the fabric to one or two sides of the chair. Then, gather the fabric around corner and pinch it such that there are layers folding on one another.

I'd also recommend turning it over while you're pinching the fabric to make sure everything looks right on the front. Then, staple it and admire your work!

Here is the final product! By the way, I got the fabric from IKEA for around $4 or so per yard. I think I used half a yard. That means this desk chair cost me a total of $12!! Not bad at all, if I do say so myself.  :-)
The front
The back
What have you reupholstered lately? Please comment with a link! I'd love to see your project!

Photobucket
I'm linking to...
The DIY Show Off


PS - Dear Dad, I already spoke with you today, but just wanted to say again happy Father's Day! 
Love, 
Me & your little granddoggers, Heidi and Jini  :)

12.08.2010

Warm and Comfy Sweater Pillow!

I had quite a bit of leftover cable knit sweater from my sweater candle cozie project, so why not make a pillow cover? Sweater pillows have been popping up in home decor stores as well as all over the blog world lately. And I can see why because they give you a warm comfy feeling whether you are resting your head on one or just staring at your handmade sweater pillow in admiration. 

Here is how mine turned out:

It was soo easy to make, even without a sewing machine! I simply placed my pillow form inside the body of the sweater--luckily, it was a perfect fit--and then cut one side and hand sewed two of the sides. 
I didn't turn the sweater inside out while I sewed, so it has kind of a rough edge. I'd like to say I did that for some creative unique reason, but honestly, I just wasn't really thinking. It's not bad, though! 
P.S. The husband really liked this one! That's saying something because his enthusiasm for my projects has waned recently, probably because I tend to strew unfinished projects throughout the house, not wanting to put them away until they are completely finished. Haha...oops! At least he's a good sport about it. I can make this one of my many New Year's resolutions.  

P.S.S. My little Heidz approves! She is an expert on all things comfort-related, so I value her opinion highly. (I am not crazy, I promise...okay, maybe a little dog crazy.) 
She was wearing her Christmas sweater because we just got back from taking our family Christmas portrait. Some dogs may feel humiliated when their owners make them wear clothes, but Heidi LOVES a snug little tee or sweater.
I also need to throw in a pic of my other cutie patootie, Jini. Otherwise, I would feel like I was leaving her out .
Yes, that is a leopard print Snuggie and my fleece jacket that she is laying on. She is my other comfort expert, if you can't tell. ;)
Photobucket
Thanks for looking! Check out these awesome linky parties:


Fine Craft Guild


10.19.2010

Tissue Box Cover {tutorial}

Do you ever find yourself at the store in the tissue box aisle trying (albeit unsuccessfully) to pick out the box that best matches with your décor?  But then it never seems to match when you bring it home? You try so hard to make everything else pretty, but somehow this unsightly yet necessary item has slipped through the cracks. Well, my friends, it is time to take back your room. Let's make this box fit in with all of your other beautiful things. But let's do so without resorting to bulky cheap-looking plastic covers. Maybe if it is in your budget, you can buy a sleeker and more attractive cover. But on my student-sized budget, I needed to look for another solution.

How about a cute fabric tissue box cover?  Yes please!
So, I have seen fabric box covers before, but honestly the ones I have seen have looked a little sloppy. (Trust me, though, I know mine is faaaar from perfect.) I'm pretty happy with the way my turned out. At least to me, it does not look sloppy, and here is why: (1) I used clasps on the bottom to give the box a nice tucked-in look, and (2) I used Heat 'N Bond light to line the fabric.

Thanks so much for looking! Stick around in case you are interested in making one  yourself.

                   Materials
  • Fabric (I got mine on clearance from Jo Ann's for around $3 or $4/half yard. I love it and have used it here and here. )
  • Heat 'N Bond light weight iron-on fusible interfacing (around $2, I think)
  • Scissors (on hand)
  • Ruler or measure tape (on hand)
  • Needle and thread if you're sewing by hand like me (on hand)
  • 2 Clasps (< $1)

                   Time - approx. 2 hrs (less if you own a sewing machine)

Step 1 - Trace one side of your tissue box, adding half an inch to each side. Cut that piece out and make 3 exact copies. Trace the top of the box onto the fabric - that shape is slightly different.

TIP: If you have an empty tissue box, cut the bottom half off, and then use the opening on the top as a template to trace the oval onto your top square of fabric and then cut it out. (Oh and I totally didn't do that part, but it sounds like a good idea. My oval is a little imperfect.)

Step 2 - Iron the Heat N Bond light weight interfacing onto the backs of the fabric rectangles. As I mentioned before, this is part of what I think makes the tissue box cover look sharper and less slouchy. Then cut off the excess like so…

Step 3 - Fold down a half inch on each side of the fabric rectangles and then iron down. (see below)

Step 4 - Simply sew the edges of the rectangles to the top square piece. Until you get something that looks like this…
Jini wanted to get in the pic, too.  :) Heidi, my other dog, was sitting next to her momma. {love them!}

Step 5 - Sew the sides of the rectangles together the same way until you have the basic form. You're almost done! :)

Step 6 - Cut out some strips of fabric and sew one to each side of the bottom of the cover. Now, attach a clasp by sewing it each part of the clasp to the strips of fabric on opposite sides like so…

Insert your tissue box and attach the clasps together on the bottom. There you go! Lovely! Much nicer and classier to display this than a normal boring tissue box. Yay! :)

The final pic once again. 

Here's another angle.

Thanks for checking this tutorial out! If anyone makes their own fabric tissue box cover based on mine, please let me know so that I can show it off here. Thank you!!

I'm linking to...
Weekend Wrapup @ Tatertots and Jello Show & Share Day @ Just a Girl Wordless Wednesdays Spotlight Yourself Blue Cricket Design We Did It Wednesday @ Sew Much Ado Show Us What You're Workin' With @ Me & My Bucket 100 Ideas Under $100 @ Beyond the Picket Fence Hoo's Got Talent @ Night Owl Crafting Look What I Made! @ Creations by Kara Creative Share Wednesday @ The Trendy Treehouse


10.05.2010

How to reupholster a desk chair {tutorial}

I imagine most people at one point or another have owned one of your basic standard black desk chairs. They are not much to look at, but they serve their purpose, which is why I have hung onto mine for...well, let's see...since I was 16? Yep, that's right. My desk chair and I go back...way back. Somewhere along the way she got a stain. Do you see it? Ha! That's a joke. Of course you do! It's gross. Eww. Anyway, I decided that I needed to give my chair a new look. I wanted to brighten her up, so that she fits in better with the decorating and color scheme of our study/guest bedroom. 

So, how did my desk chair go from this....
...to this?

I would be thrilled to tell you!

Materials
  • Staple gun ($20) with 3/8 inch staples
  • 1.5 yards of fabric or less (Mine is a cotton fabric from Walmart, which I chose mostly because it is only $2.50/yard.)
  • Spray paint (optional; $5 for Krylon Fusion for plastics white)
  • Screw driver (already own)
  • Scissors for cutting the fabric (already own)

Time - It took about 30 minutes to take the chair a part and reupholster the fabric, but it took much longer to spray several coats of paint on the base of the chair.


First, you will need to remove the hardcover backing of the backrest, as well as the seat from the base. It is a lot easier than it looks, and putting it back together isn't a whole lot harder. 

At this point, you will have the back of the chair, with the hardcover removed. Cut out some fabric of generous proportions. 

Start stapling! :) Already? Yes, go ahead. Mistakes can be fixed by pulling out staples with the back of a hammer. 

I don't know if maybe I was doing something wrong (this is my first time to use a staple gun), but occasionally the staple would refuse to go in all the way, so I would have to hammer in the part of the staple that was still poking out. No problem! 

For clean edges, you will want to scrunch up the fabric (as shown above) when you staple.

 Cut off the excess fabric after you finish stapling.

By the way, just a reminder to make sure you are not covering the holes where the screws go in with fabric. I wasn't thinking and made the mistake of stapling over those holes, and then having to remove some staples to fix the problem. Oops!

The photos below are what the backrest part should look like after you finish stapling around it.

Yay! Almost done!

Now just repeat these steps on the seat of the chair.

If you only want to reupholster the seat and backrest, then you are done. Way to go! Put the chair back together and you are ready to sit and admire your fresh and beautiful desk chair. 

Alternatively, you can do what I did and paint the base of the chair and the hardcover of the backrest. I am so happy I did, but that's because the black didn't fit in our color scheme. I used Krylon Fusion for Plastics spray paint in white. It has held up really well. I tend to put my bare feet or shoe-ed feet on the base of the chair as I'm sitting, but not a single scuff mark is visible! (By the way, it took a whole can of spray paint and several coats to cover every nook and cranny of this chair. But so worth it I think!


Another little thing I attempted to do is add a flower to the backrest cushion. I cut out white fabric and ironed on some Heat 'N Bond to the back, and then I tried to iron it on to my already upholstered cushion. Bad bad idea.


The petals of the flower all fell off. But I was left with this! :)

I'm pretty happy with this subtle flower impression!


I am so happy I tried this project! I was kind of nervous I would mess it up, but it was way easier than I had imagined.


I'm linking to...